Hack Your Keys to Upgrade Your Key Organizer
If you're into everyday carry (EDC) gear, you know how crucial it is to keep things streamlined. One persistent annoyance? Bulky, incompatible key heads that throw off your sleek key organizer setup. One smart DIY hack - customizing your keys to streamline your pocket carry. We’ve tested dozens of solutions, and here’s what actually works.
Quick Answer
Remove bulky key heads using basic tools to streamline your keys in your Keyport Pivot or other slim key organizer. This DIY key hack improves carry comfort, reduces bulk, and makes your pocket carry solution unique.
Why Trust This DIY Guide
At Keyport, we’ve spent over a decade engineering modular key organizers and optimizing the keys that go in them. Our proprietary Key Blades are custom key blanks designed for the Keyport Slide, featuring a smaller, lighter, and uniform head that replaces bulky originals for a cleaner, more consistent fit.
But this guide isn’t about Key Blades—it’s about a DIY key hack that brings a similar benefit: removing excess material from standard key heads to dramatically slim your setup for use in the Keyport Pivot or other EDC organizers. Unlike our proprietary blades, this method doesn’t add a new head—it simply removes the bulk you don’t need.
We’ve tested thousands of these key conversions ourselves and worked with customers who’ve done the same. Trust us—we’ve decapitated more key heads than Robespierre. The result? Keys that sit flush, rotate properly, and make your everyday carry sleeker and smarter.
This isn’t just a clever trick—it’s a battle-tested mod backed by years of real-world EDC experience.
DIY Key Head Removal: The EDC Upgrade That Instantly Slims Your Carry
How to streamline bulky keys for a slimmer, smarter everyday carry setup
The DIY key hack that improves fit, rotation, and pocket comfort instantly
Why trimming key heads makes your key organizer more modular and efficient
How we’ve tested thousands of key conversions to perfect this method
Which keys benefit most from head removal (Multilock, bike locks, SC1s)
The difference between Keyport Key Blades and DIY-modded keys - and when to use each
Quick Summary
Best Pick: Keyport Pivot 2.0 premium key organizer fits flat-trimmed keys effortlessly
Hidden Gem: Bike lock and Multilock keys benefit most from head removal
Buyer Tip: Drill new holes in safe or SC1 keys for better alignment
Use Case: Travel-friendly, slim gear optimized for happier pockets and slimmer key organizers.
Pro Insight: Keys stack flush and rotate properly only when flat-modified
Table of contents
Hack Your Keys to Upgrade Your Key Organizer Quick Answer Why Trust This DIY Guide DIY Key Head Removal: The EDC Upgrade That Instantly Slims Your Carry Quick Summary Watch: How to Remove Key Heads for a Slim Key Organizer Setup Why Cut the Head Off Your Keys? Tools You'll Need Step-by-Step: Key Head Removal Best Keys for This Hack Before vs. After: Side-by-Side Comparison Table Make It Yours: Join the Keyport Maker Program How It Transforms Your EDC The Simple DIY Hack That Supercharges Your EDC Frequently Asked Questions (FAQ) Removing Key Heads for Key Organizers
Watch: How to Remove Key Heads for a Slim Key Organizer Setup
Want to see the full DIY process in action? In this step-by-step video tutorial, we show you exactly how to remove bulky key heads, clean the cut, and re-drill your keys to fit perfectly in the Keyport Pivot 2.0 or any modular key organizer. Whether you’re using a Dremel, belt sander, or just basic hand tools, this guide covers everything you need to get a clean, functional result.
✅ Visual guide for trimming plastic and metal key heads
✅ How to center punch and drill holes for proper fit
✅ Tips for smoother key rotation and flush stacking
✅ Common mistakes to avoid when modifying household keys
If you’ve ever searched “how to modify keys for a key organizer” or “how to remove a key head safely,” this is your go-to resource.
Why Cut the Head Off Your Keys?
Most keys—whether plastic or metal—were never designed for modern key organizers. Bulky heads, odd shapes, and unnecessary weight can throw off the balance, increase pocket wear, and reduce the capacity of your EDC setup. Trimming them down makes your gear leaner, lighter, and better suited for keychain organizers like the Keyport Pivot.
Oversized plastic and metal key heads add unnecessary bulk and discomfort
High-security or auto-style keys often disrupt EDC systems
Keyport Pivot and Slide work best with flat, uniformly sized key blades
Mythbuster: You can safely trim most household keys—just not chipped car keys
Tools You'll Need

You don’t need a full workshop to pull off this key mod, just a few common DIY tools and a steady hand. Most of these are inexpensive and can be found at your local hardware store or online. If you’ve ever done basic home repairs or bike maintenance, you’re more than ready for this.
Small clamp or table vise
Dremel or angle grinder with a cutting wheel
Hammer and chisel
Belt sander or file
Center punch
Drill with 4mm bit
Tip: Don’t have all of these? You can often substitute a rotary tool for the sander or file, and a handheld clamp for a vise if you’re working carefully.
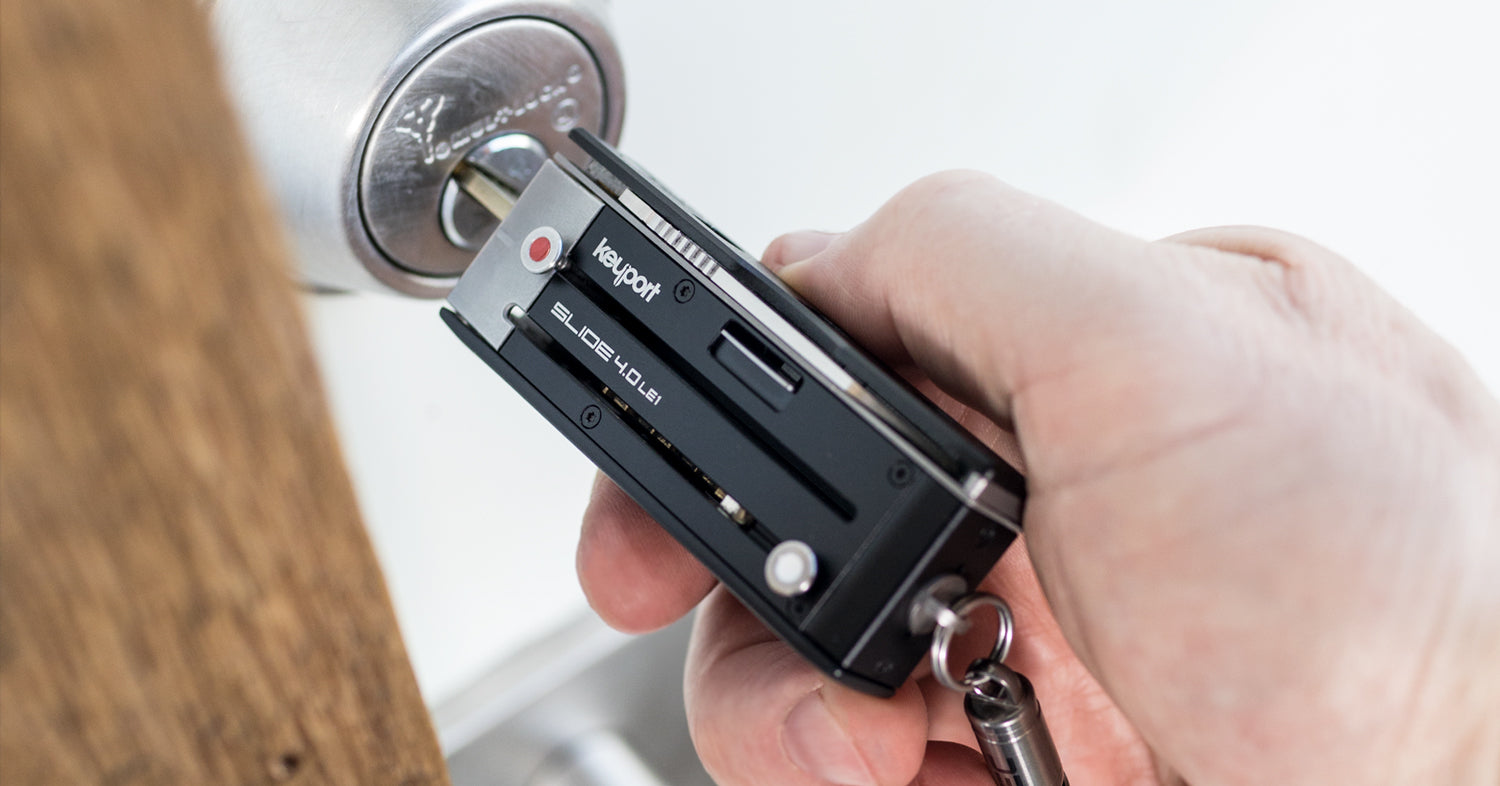
Why the Keyport Pivot 2.0 Is the Ultimate Key Organizer for DIYers
The Keyport Pivot 2.0 key organizer is a DIYer’s dream when it comes to key organization. Built from durable, aircraft-grade aluminum with a proprietary locking mechanism, the Pivot 2.0 is designed to handle custom key mods like headless key conversions with ease. Its single-sided chassis eliminates bulk and prevents keys from fanning out awkwardly, while the modular faceplate system lets you add tools, trackers, flashlights, and more without bloating your carry. Whether you’re trimming keys, customizing your loadout, or just tired of pocket jangle, the Pivot 2.0 turns your everyday carry into a sleek, fully personalized multitool—and it only gets better the more you tweak it.

Step-by-Step: Key Head Removal
1. Remove Plastic Head
Hold the key on the table with the blade up and position your chisel securely on the flat side on the blade of the key with your fingers out of the way. Hammer down to slice the plastic head off flush with the metal key blade. Repeat on the other side.


2. Drill a New Hole (If Needed)
Center punch first, then drill a 4mm or 5/32" hole to mount it on the Pivot pin.


3. Debur and Shape
Cut and/or sand the smaller profile. Debur edges with a file for a smoother fit.


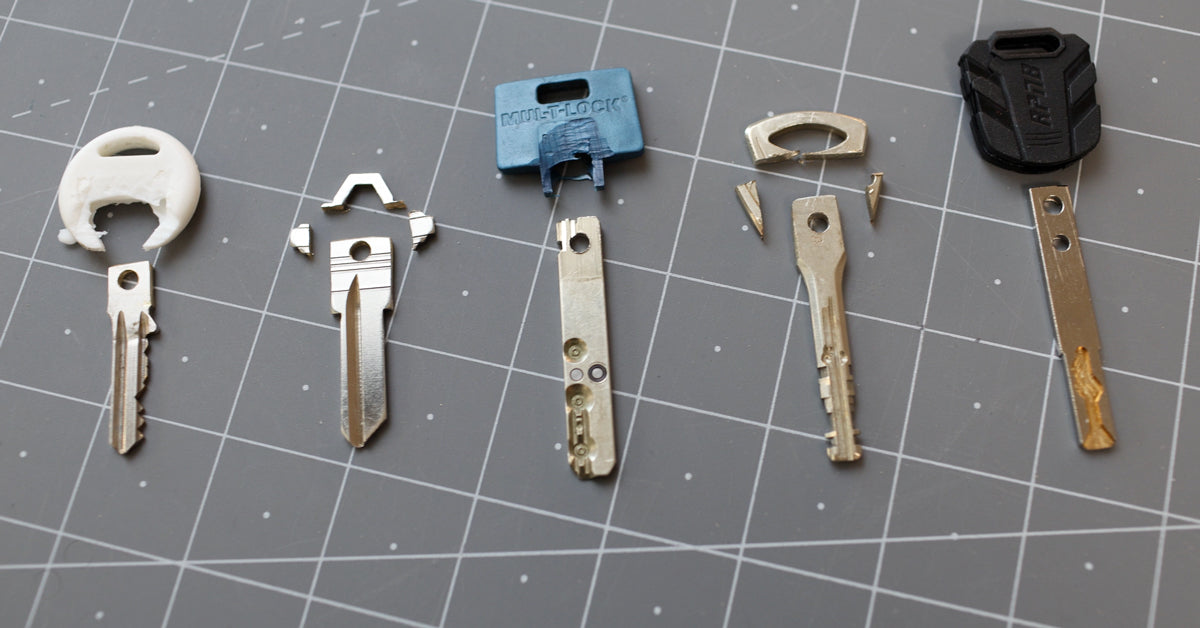
Best Keys for This Hack
Not all keys are created equal when it comes to head removal. Some benefit more than others—especially those with oversized heads, off-center holes, or irregular profiles that disrupt a clean EDC setup. Based on our extensive testing, here are the key types that see the biggest improvements with this mod:
- Multilock keys : Slims them by over 50%
- Bike lock keys : Functional post-trim, lose bulk
- SC1/Schlage : Fixes fit/play issues by re-centering holes and removes jagged sides that can dig into your leg when it's in your pocket..
Pro Tip: Always test the key in its lock before and after modifying to ensure continued function. Trim gradually and double-check alignment before drilling.
Before vs. After: Side-by-Side Comparison Table

Feature |
Before DIY Hack |
After DIY Hack |
|---|---|---|
| Pocket Fit | Bulky, uneven | Slim, uniform |
| Rotation in Pivot | Stiff or misaligned | Smooth and secure |
| Capacity | Limited by key size | More room for tools/keys |
| Visual Appeal | Cluttered | Clean and streamlined |
Make It Yours: Join the Keyport Maker Program
If you love customizing your gear, the Keyport Maker Program was built for you. It’s our open invitation to tinkerers, EDC modders, 3D printing hobbyists, and creative DIYers who want to build on top of the Keyport ecosystem. Whether you’re designing custom faceplates, integrating new tools, or prototyping your own modules, this program gives you the specs, tools, and community to bring your ideas to life.
Access to STL files for Pivot faceplates and module templates
Developer tools and guides for seamless integration with Keyport’s modular system
Direct feedback channel to our product team (we actually read it)
Spotlight opportunities to showcase your creations in the Keyport community
No gatekeeping—you don’t need a degree, just ideas and a drive to build smarter gear
Whether you’re printing custom NFC modules, designing tactical faceplates, or coming up with the next must-have EDC upgrade, the Maker Program gives you the foundation to create your own Keyport-compatible tools.
How It Transforms Your EDC
Applying this simple key head hack makes a surprisingly big difference in your daily carry. You’ll immediately notice how much smoother, slimmer, and more efficient your setup becomes—without needing to buy new keys or complex tools. It’s one of those rare DIY upgrades that delivers both form and function.
Keys sit flush and rotate cleanly, reducing fumble time and frustration
Less pocket wear and discomfort—no more jabbing, poking, or awkward angles
Extra room in your organizer for tools, modules, or future expansions
Integrates seamlessly with Keyport Slide, Pivot 2.0, and other modular accessories for a fully optimized loadout
The third EDC essential after wallet and phone? A properly fit key organizer. When your keys are dialed in, everything else in your carry just works better.

The Simple DIY Hack That Supercharges Your EDC
If you care about optimizing your everyday carry, this is one of the highest-impact upgrades you can make. Trimming your key heads isn’t just a cosmetic fix—it’s a functional enhancement that improves comfort, fit, and efficiency every time you reach for your keys.
Customizing your key setup is the often-overlooked foundation of elite EDC
This simple hack turns bulky, mismatched keys into a clean, modular system
Unlock extra space for tools, remove friction from your routine, and slim your carry
Want a truly optimized setup? It starts with a Keyport Pivot—and a few minutes with a Dremel. The best gear works better when your keys do too.
Frequently Asked Questions (FAQ) Removing Key Heads for Key Organizers
What is the best key organizer in 2025?
The Keyport Pivot 2.0 is one of the best modular key organizers available in 2025. It’s highly customizable, compatible with DIY-trimmed keys, and designed to integrate seamlessly with tools like flashlights, multitools, and digital contact keys—making it a favorite among EDC enthusiasts and DIYers alike.
Want to compare them all?
Check out our Ultimate Guide to Key Organizers to find the perfect setup for your carry style.
Why is a key organizer considered the third essential item in EDC?
After your wallet and phone, your keys are the item you use most. Organizing them improves pocket comfort, reduces noise and clutter, and adds efficiency to your everyday carry—earning it a spot as the third EDC essential.
Can you remove the head from car or motorcycle keys for this hack?
Only if the key doesn’t have an embedded transponder chip. Standard mechanical keys are fine to trim, but chipped keys require special handling. Reach out to Keyport's customer support, and we will do our best to answer any specific questions you may have.
Will this DIY key head removal work with non-Keyport key organizers?
Yes, this mod works with many popular key organizers although we recommend you take this opportunity to try a Keyport Pivot key organizer if you are using one of the others. Just make sure with those key organizers that hold keys on both ends, they are long enough to support the length of the modified keys.
What tools do I need to safely remove a key head?
You’ll need a few basic tools:
Clamp or vise to secure the key
Chisel and hammer to break off the head
Dremel or angle grinder to clean the cut
Belt sander or file for finishing
Center punch and 4mm drill bit to create a new mounting hole (if needed)